PGA TOURLeaderboardWatch + ListenNewsFedExCupSchedulePlayersStatsGolfbetSignature EventsComcast Business TOUR TOP 10Aon Better DecisionsDP World Tour Eligibility RankingsHow It WorksPGA TOUR TrainingTicketsShopPGA TOURPGA TOUR ChampionsKorn Ferry TourPGA TOUR AmericasLPGA TOURDP World TourPGA TOUR University
5D AGO

Five things to know: Harbour Town Golf Links

8 Min Read

Need to Know

Five things to know: Harbour Town Golf Links


    Written by Jeff Eisenband @JeffEisenband

    From Augusta National to Harbour Town Golf Links, the PGA TOUR now heads to the South Carolina coast for the 56th playing of the RBC Heritage.

    In its second year as a Signature Event, the TOUR's best head from Augusta National’s open fairways and bentgrass greens to a different challenge with razor-thin fairways and tight Bermuda greens. The RBC Heritage, with a history dating back to 1969, has long been a favorite stop for TOUR players, especially those with more reliance on their target game than length. While technology and fundamentals have changed over the decades, Harbour Town remains one of golf’s greatest tests – and tourist destinations – on Hilton Head Island, South Carolina.


    1. “Links” is a loose term

    The word “links” might provoke visuals of an open, undulating course with wide greens like St Andrews or Chambers Bay. Or perhaps a track hugging the water and riding the wind like Pebble Beach.

    Harbour Town presents a different interpretation of links golf, to put it loosely. Trees dominate much of the course, as the land was shaped from 300 acres of oak, pine and magnolia trees. Most par 4s and par 5s provide little margin for error off the fairway, as trees stand in the way of the slightest wayward tee shot. Many of those approach shots will be played from pine needles, not rough.

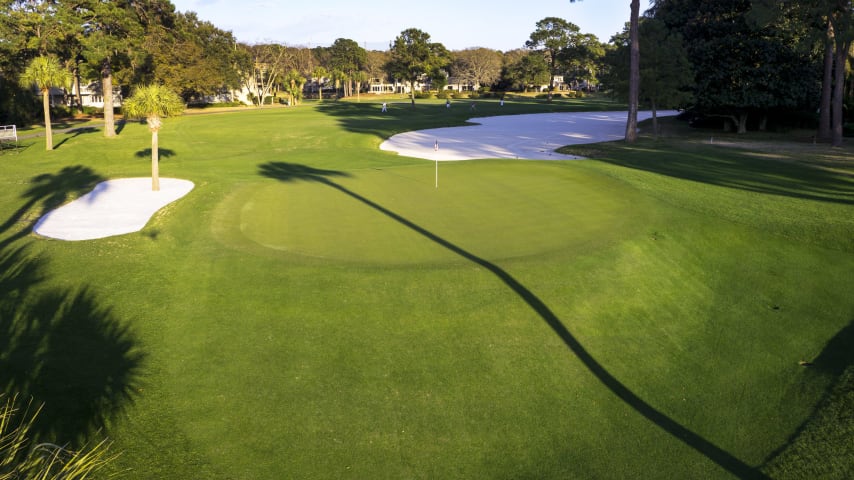
    For those lucky enough to have a direct approach shot in, the greens have their own un-links-like challenge. The slick Bermuda greens average 3,700 square feet. In comparison, Augusta National’s greens average 6,435 square feet. St Andrews dials it up to 13,608 square feet.

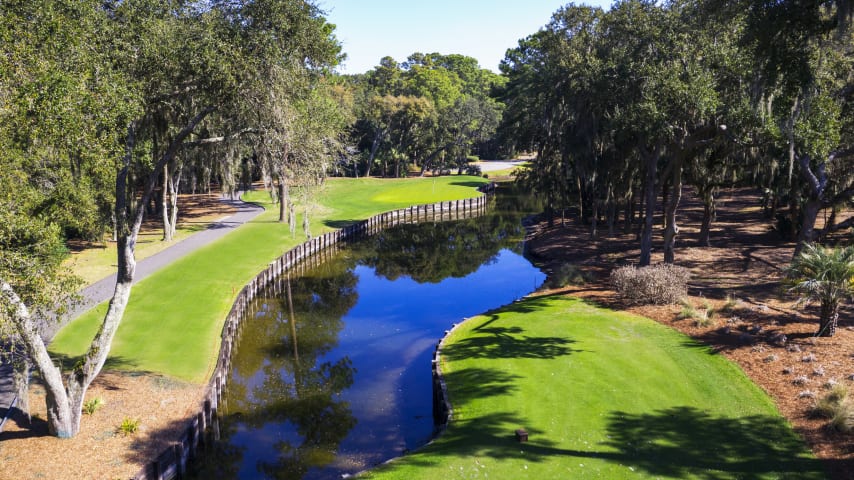
    Natural water doesn’t come into play until No. 17, as the Calibogue Sound hugs the left side of the 198-yard par 3. Finally, No. 18 plays as the most links-y, with wind coming off the sea to the left. Still, native South Carolina trees await to the right.

    In defense of its links name, Harbour Town is played on mostly flat ground by the water and contains a handful of pot bunkers, including a few dangerous ones tucked behind the ninth green.

    It’s just like any links course (except with hundreds, maybe thousands, of trees trapping any ball that runs out or is mishit off the tee).


    2. All about that accuracy

    C.T. Pan, Webb Simpson and Stewart Cink have earned recent wins at Harbour Town. Matt Kuchar, Brandt Snedeker and Brian Gay have all raised the trophy. Davis Love III won the RBC Heritage five times.

    That list provides a sense of the game needed to win on Hilton Head Island. Length is not the formula. At 7,213 yards, Harbour Town plays as one of the shorter courses on the PGA TOUR. Add in those 3,700-square-foot greens and multitude of trees, and Harbour Town demands precision shots before power shots.

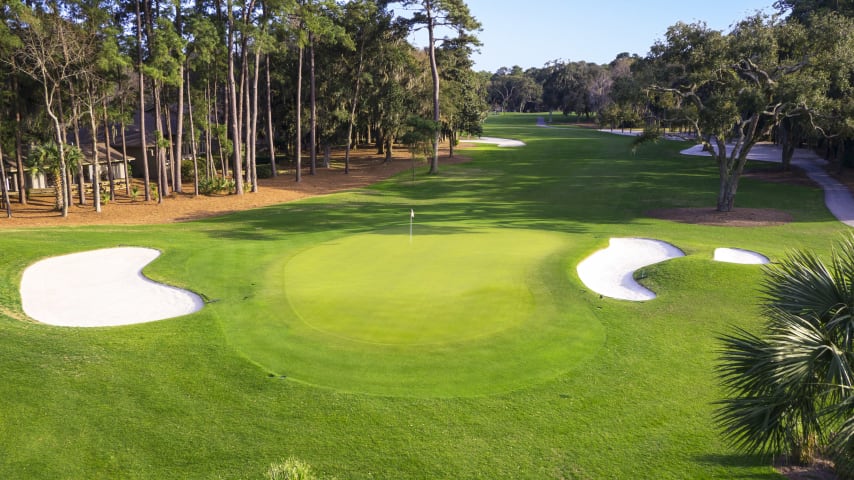
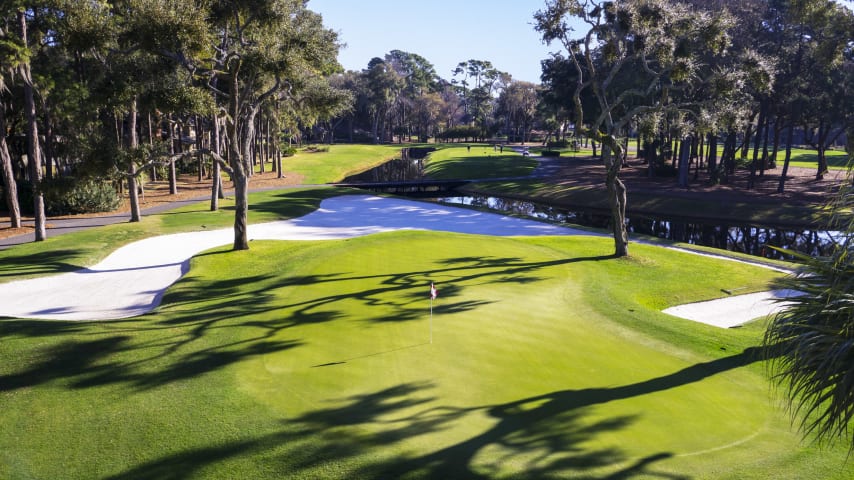
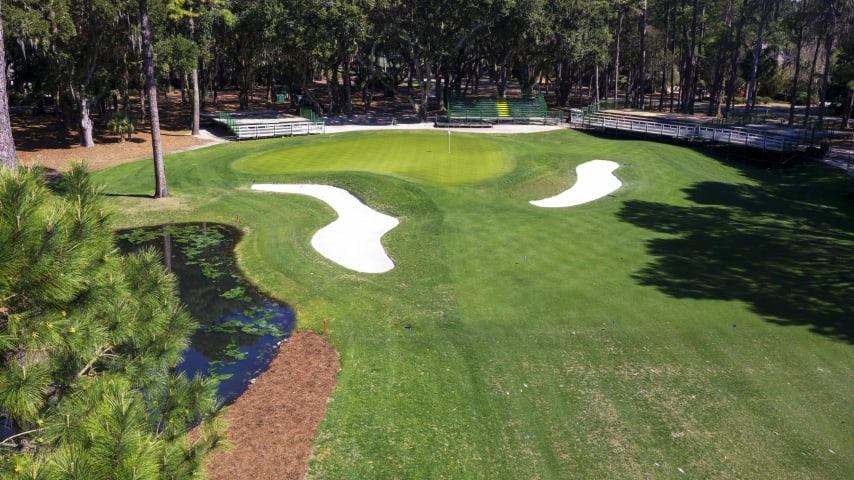
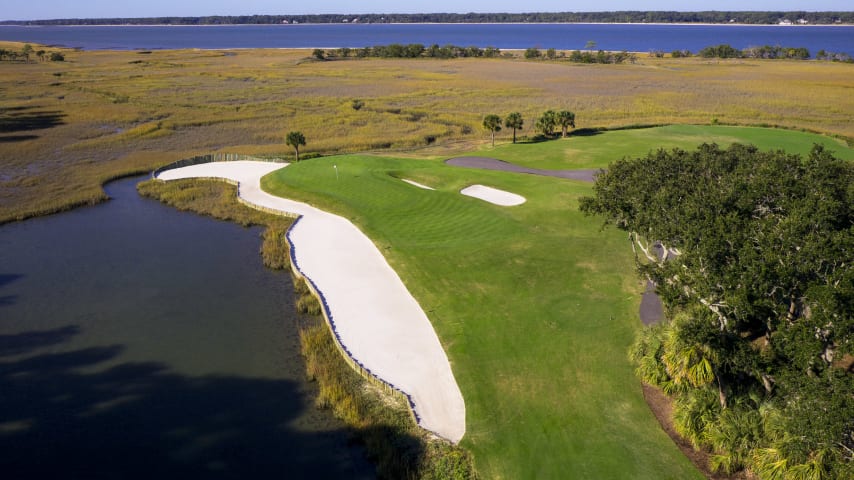
    While natural water comes into play on Nos. 17 and 18, perhaps the most difficult aquatic challenges come on Nos. 4, 8 and 14. The fourth and 14th holes are effectively mirror images of each other, with No. 4 being a 200-yard par 3 hugging water on the left half of the green; No. 14 is a 192-yard par 3 with water on the right half of the green. Both can also bring water into play directly in front of the green, depending on tee box location.

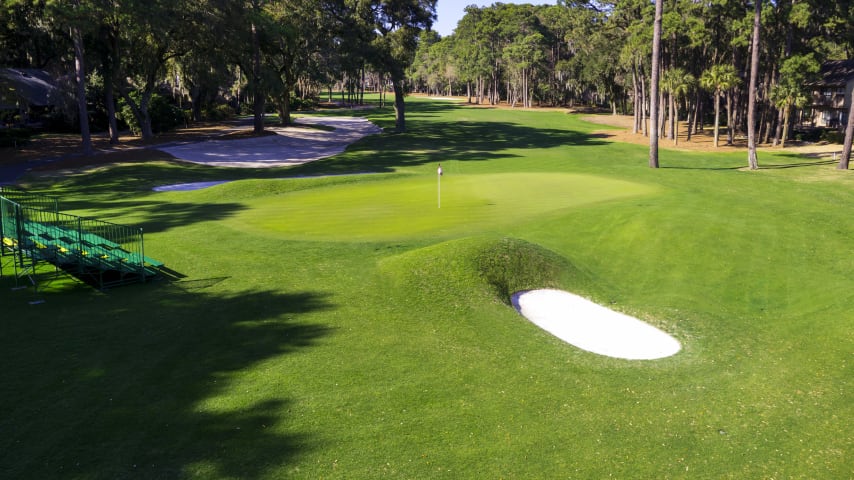
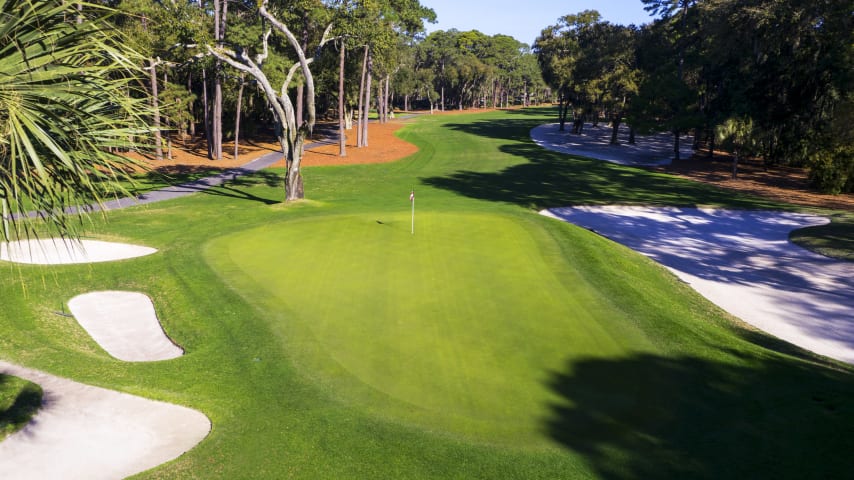
    No. 8 traditionally plays as Harbour Town’s most difficult hole, as a dogleg-left approach shot comes into a narrow green with water on the left. Unlike the aforementioned par 3s, this water hazard is protected by a stretch of sand beside the green, showing some mercy on the field.
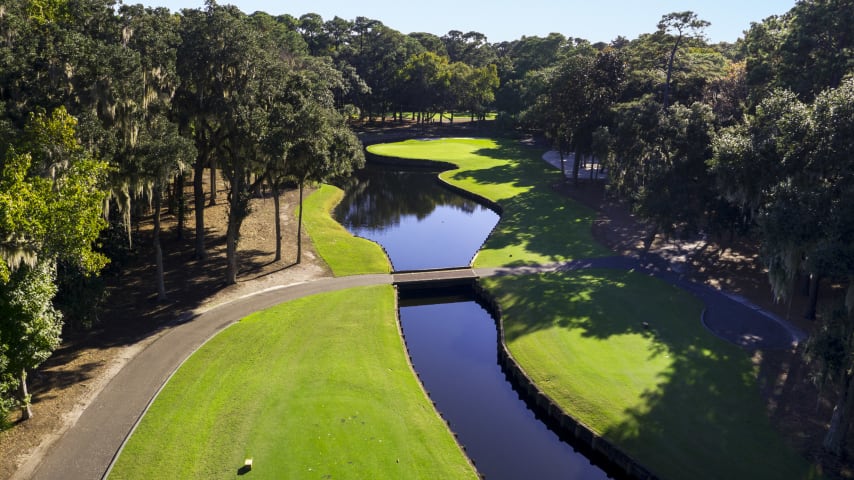

    A straight drive is imperative to stay between overhanging branches in a chute only 20 yards wide, but the fairway opens up at the landing area. A short or medium iron should reach a green protected by both sand and grass bunkers.

    A straight drive is imperative to stay between overhanging branches in a chute only 20 yards wide, but the fairway opens up at the landing area. A short or medium iron should reach a green protected by both sand and grass bunkers.

    Long hitters can reach the green in two if they keep the drive on the left side of the fairway. Otherwise, the second shot should be positioned down the left side to open up the green, which lies on a diagonal, for the third shot.

    Long hitters can reach the green in two if they keep the drive on the left side of the fairway. Otherwise, the second shot should be positioned down the left side to open up the green, which lies on a diagonal, for the third shot.

    Trees line both sides of the fairway, necessitating a straight shot from the tee. A large bunker guards the front of the green, with three more positioned to the right. A medium to short iron should get the job done, but the small green can be hard to hold.

    Trees line both sides of the fairway, necessitating a straight shot from the tee. A large bunker guards the front of the green, with three more positioned to the right. A medium to short iron should get the job done, but the small green can be hard to hold.

    A classic Pete Dye risk/reward design. There is ample room on the right to bail out, and a hidden bunker behind the green can save your ball from a hungry lagoon.

    A classic Pete Dye risk/reward design. There is ample room on the right to bail out, and a hidden bunker behind the green can save your ball from a hungry lagoon.

    Aim just to the right of the left fairway bunker, and then calculate your odds of making the green in two. The obstacles: A massive strategic bunker to the right, water and a greenside bunker left. A deep but narrow green falls off to the right and rear.

    Aim just to the right of the left fairway bunker, and then calculate your odds of making the green in two. The obstacles: A massive strategic bunker to the right, water and a greenside bunker left. A deep but narrow green falls off to the right and rear.

    Devilishly difficult to master, this dogleg par 4 requires a precise drive to the middle right just left of the fairway bunker. Take advantage of the open avenue to the flag and try to avoid the bunkers flanking the green.

    Devilishly difficult to master, this dogleg par 4 requires a precise drive to the middle right just left of the fairway bunker. Take advantage of the open avenue to the flag and try to avoid the bunkers flanking the green.

    The green is surrounded by sand, but the real hazards here are the trees. They will reject any off-line shot and make a successful recovery very tricky. The green is narrow but deep, and pin placement can impact club selection.

    The green is surrounded by sand, but the real hazards here are the trees. They will reject any off-line shot and make a successful recovery very tricky. The green is narrow but deep, and pin placement can impact club selection.

    Rated as the toughest hole on the course, No. 8 makes a well-placed drive essential to avoid water and strategically placed trees. Carrying the dogleg past the first two pines gives you a shot at one of the most elusive greens anywhere. Commend yourself for matching par, because you will have triumphed over a stubbornly resistant adversary.

    Rated as the toughest hole on the course, No. 8 makes a well-placed drive essential to avoid water and strategically placed trees. Carrying the dogleg past the first two pines gives you a shot at one of the most elusive greens anywhere. Commend yourself for matching par, because you will have triumphed over a stubbornly resistant adversary.

    Placement is more important than power on this short but deceptive par 4. Drive to the middle of the fairway and avoid battling trees on your approach. The heart-shaped green is protected both in front and behind by sand.

    Placement is more important than power on this short but deceptive par 4. Drive to the middle of the fairway and avoid battling trees on your approach. The heart-shaped green is protected both in front and behind by sand.

    A wide landing area invites a big drive, but temper your gusto if you want to avoid the lagoon on the left. After a good drive, use a medium or long iron to get to a green nestled between woods and two strategically-placed bunkers.

    A wide landing area invites a big drive, but temper your gusto if you want to avoid the lagoon on the left. After a good drive, use a medium or long iron to get to a green nestled between woods and two strategically-placed bunkers.

    Plot your drive to stay within the chute, because a dangerous duo of trees and water lurks on both sides of the fairway. From the fairway, a long to medium iron must be rifled to the green, carefully avoiding the tree gracefully protecting the right side. The green is also flanked by bunkers.

    Plot your drive to stay within the chute, because a dangerous duo of trees and water lurks on both sides of the fairway. From the fairway, a long to medium iron must be rifled to the green, carefully avoiding the tree gracefully protecting the right side. The green is also flanked by bunkers.

    Reaching the dogleg off the tee is imperative for any chance at par. Then the green is in range with a medium or long iron, but a back pin placement can make as much as a three-club difference. Two bunkers stand as the final challenge to those optimists in quest of par.

    Reaching the dogleg off the tee is imperative for any chance at par. Then the green is in range with a medium or long iron, but a back pin placement can make as much as a three-club difference. Two bunkers stand as the final challenge to those optimists in quest of par.

    The tee shot here must be positioned to the right side of the fairway to set up the approach to the green. Then the second shot will be a short iron between the two large oaks. But don't score your par until you've surmounted the two final obstacles - a large cypress-banked bunker and a natural bunker just behind the green.

    The tee shot here must be positioned to the right side of the fairway to set up the approach to the green. Then the second shot will be a short iron between the two large oaks. But don't score your par until you've surmounted the two final obstacles - a large cypress-banked bunker and a natural bunker just behind the green.

    This is a beautiful aquatic layout with water from tee to green on the right. Thanks to overhanging trees, the green is a small, isolated target with an adjacent, small pot bunker bound to act as a magnet for the unsuspecting.

    This is a beautiful aquatic layout with water from tee to green on the right. Thanks to overhanging trees, the green is a small, isolated target with an adjacent, small pot bunker bound to act as a magnet for the unsuspecting.

    You could call No. 15 a thinking challenge, since this great par 5 demands careful deliberation and shot execution all the way from tee to flag. To avoid nightmares on the approach, keep the drive from the tee as close to center as possible. This will save you from the fate of water on the left and zealous bunker-guardians on both sides.

    You could call No. 15 a thinking challenge, since this great par 5 demands careful deliberation and shot execution all the way from tee to flag. To avoid nightmares on the approach, keep the drive from the tee as close to center as possible. This will save you from the fate of water on the left and zealous bunker-guardians on both sides.

    The exclamation point of sand just about says it all on this interesting dogleg left. Avoid the left. But also beware the slalom-like pines to the right. If you arrive unscathed after that first drive, it's just a short iron to the green. Aim carefully. The cluster of bunkers to the right can easily humiliate par-seekers.

    The exclamation point of sand just about says it all on this interesting dogleg left. Avoid the left. But also beware the slalom-like pines to the right. If you arrive unscathed after that first drive, it's just a short iron to the green. Aim carefully. The cluster of bunkers to the right can easily humiliate par-seekers.

    Water, water nearly everywhere says one thing: Take that bold iron shot and make it accurate. In this scenario, the 90-yard bunker is the next best thing to a friend, since it could save a slightly off-center tee shot from a watery extension. Still, the head or crosswinds, which are the norm on this hole, can easily carry a shot into the lagoon.

    Water, water nearly everywhere says one thing: Take that bold iron shot and make it accurate. In this scenario, the 90-yard bunker is the next best thing to a friend, since it could save a slightly off-center tee shot from a watery extension. Still, the head or crosswinds, which are the norm on this hole, can easily carry a shot into the lagoon.

    In this emerald-hued finale, the famous lighthouse becomes a beacon to landlubbers. A successful shot is one aimed toward the cherished landmark. The goal is the wide landing area jutting into Calibogue Sound. A word of advice on one of golf's most spectacular finishing holes: the long approach to the flag offers ample bailout to the right where the innocent-looking but insidious mounding has caused many want-to-be champs to lose a sought-after par.

    In this emerald-hued finale, the famous lighthouse becomes a beacon to landlubbers. A successful shot is one aimed toward the cherished landmark. The goal is the wide landing area jutting into Calibogue Sound. A word of advice on one of golf's most spectacular finishing holes: the long approach to the flag offers ample bailout to the right where the innocent-looking but insidious mounding has caused many want-to-be champs to lose a sought-after par.


    3. The windy finish

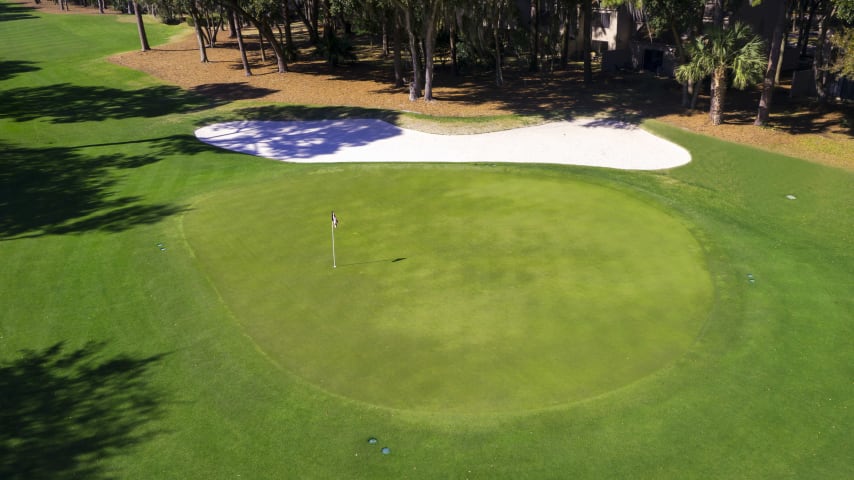
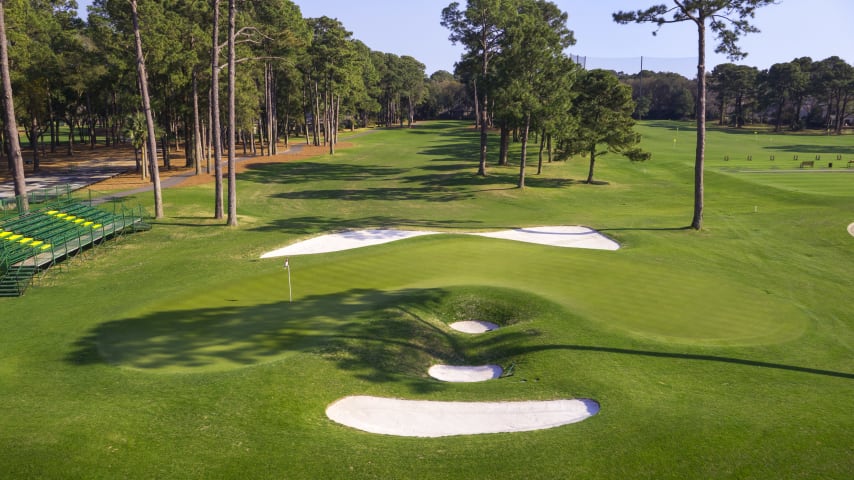
    After making it through the first 16 holes at Harbour Town, the final two holes can feel like a totally different course. On No. 17, a 198-yard par 3, trees no longer present an issue around the green, which is stationed in the Calibogue Sound. Instead, the exposed landing area is subject to the winds whipping off the lagoon. Typically, this causes a headwind at the tee box or a crosswind directly toward water on the left of the green.

    Between the green and the left water is a 90-yard bunker. Two more bunkers, including one of the deeper greenside bunkers on the course, await on the right side. This treacherous tee shot can sometimes convince a player to bail out into the sand or purposely lay up in the fairway cut short right of the green.

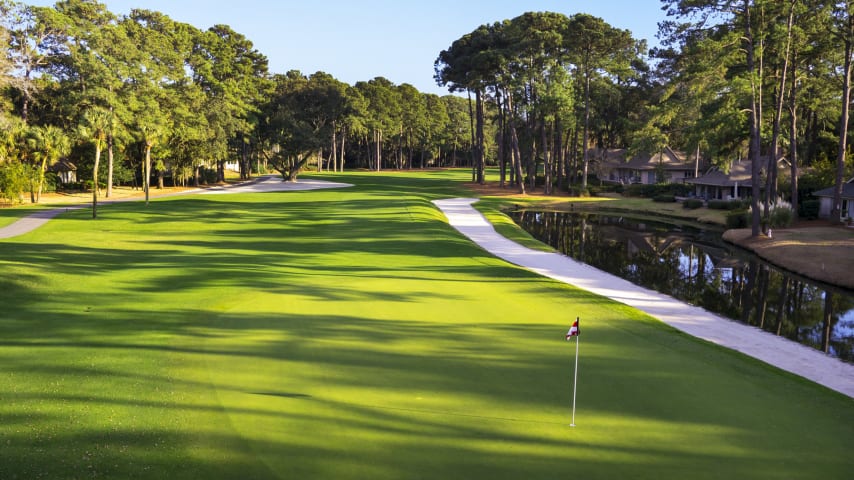
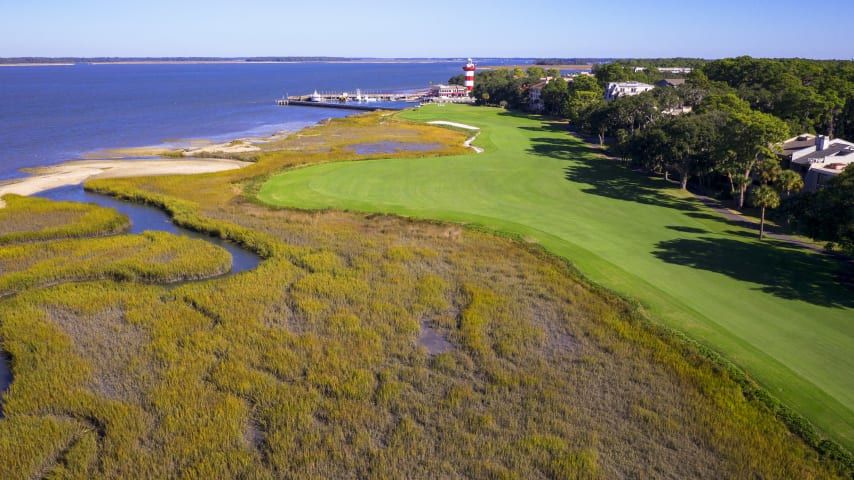
    Next, players finish with Harbour Town’s trademark par-4 18th hole, with the marsh jutting into the fairway and green landing areas. A tree line against the right side of the fairway makes sure to provide players with no safe tee shot. In the distance, the Harbour Town Lighthouse, initially built to help navigate boats, provides players the perfect target off the tee, but “aiming at the lighthouse” is easier said than done.

    Up at the green, water awaits on the left and short side, while a miss right does provide extra dry land. However, with thousands of fans usually cheering at the big finish, who doesn’t want to take a chance at glory?


    4. Pete Dye-Jack Nicklaus pedigree

    As the story goes, in 1968, Charles E. Fraser, the man behind Sea Pines Resort and much of Hilton Head’s tourist growth, wanted to construct a championship golf course with an old-fashioned look on the island. He also wanted a major name attached, so he went to 28-year-old Jack Nicklaus, then a seven-time major champion.

    Nicklaus admitted his course design skills were raw, but he recommended bringing in a fellow Columbus-area native and budding course architect: Pete Dye.

    “Never heard of him,” Fraser said.

    Dye was 43 years old, but he had less than 10 golf courses to his name at the time. Nicklaus knew Dye from their days playing against each other, and in 1967, they designed The Golf Club near Columbus together.

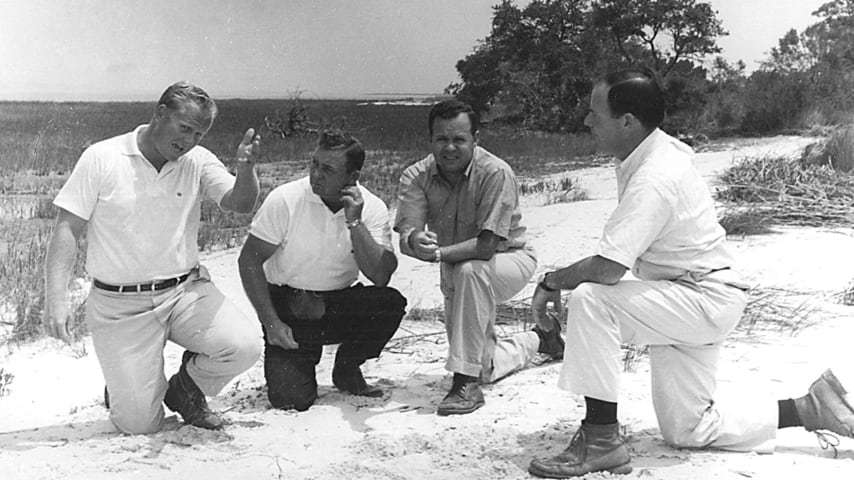
    From left to right, Jack Nicklaus, Donald O’Quinn, Charles Fraser, Pete Dye prior to the construction of Harbour Town Golf Links. (Credit the Heritage Classic Foundation)

    Dye and Nicklaus officially began their Harbour Town project on July 2, 1968. That October, the PGA TOUR accepted Fraser’s pitch to host a tournament on the grounds, starting on Thanksgiving weekend of 1969. The pressure on Dye heightened fast.

    Using the property he had, Dye purposely designed a course with narrower fairways and smaller greens than most PGA TOUR players were used to navigating. Across the first two rounds of the debut event in 1969, there were 39 scores of 80 or higher.

    While some pros complained, the winner validated the challenge. Arnold Palmer became the RBC Heritage’s first victor, posting 1 under, the only score in red numbers for the week.

    “Jack’s Course is Arnie’s, Too,” Dan Jenkins’ Sports Illustrated headline read.

    Nicklaus eventually won on his own course, holding off Tom Weiskopf by three strokes in 1975.

    Dye, meanwhile, would set off on a World Golf Hall of Fame career that saw him build TPC Sawgrass, Whistling Straits and The Ocean Course at Kiawah Island, among others.

    “Harbour Town made my career,” Dye said.


    5. It jump-started Alice Dye’s napkin designs

    While Pete Dye and Nicklaus were putting their heads together at Harbour Town, Alice Dye, who designed Crooked Stick Golf Club with Pete in 1964, was still a star amateur golfer. She won the North and South Women’s Amateur in 1968, represented the U.S. in the 1970 Curtis Cup and won the U.S. Senior Women’s Amateur in 1978 and 1979.

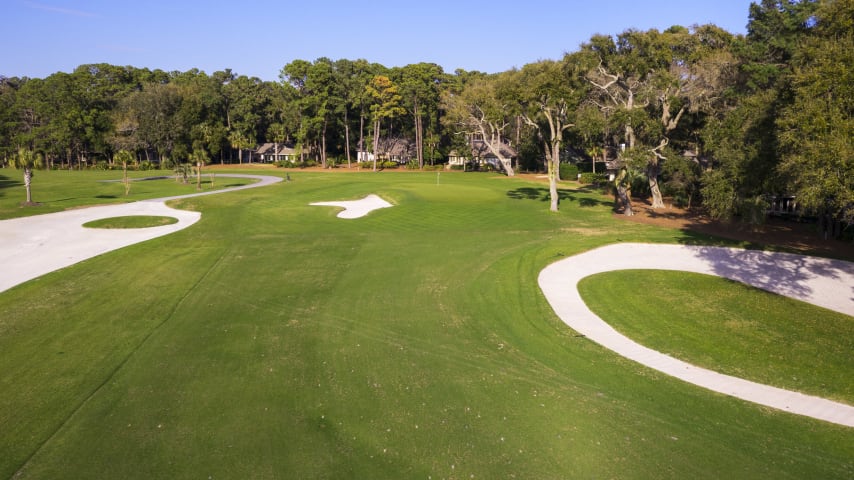
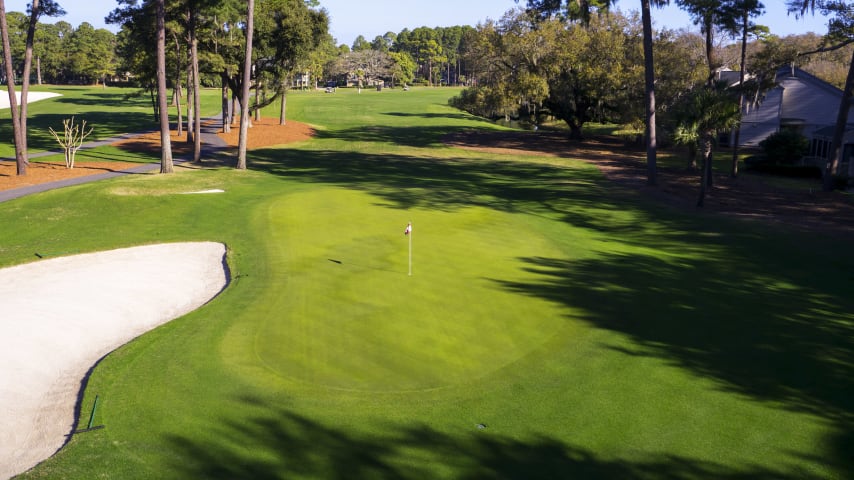
    In designing Harbour Town, Pete found himself with architect-block on the 13th hole. He had the routing envisioned, but not the design. That’s when Alice grabbed a napkin and sketched a dogleg, making this the second-most famous hole she designed on a napkin (No. 17 at TPC Sawgrass’ Stadium Course being the first in the following decade).

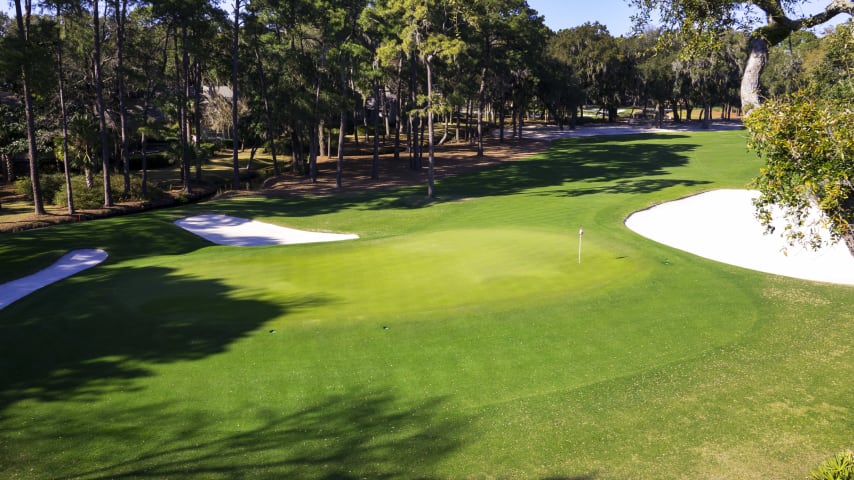
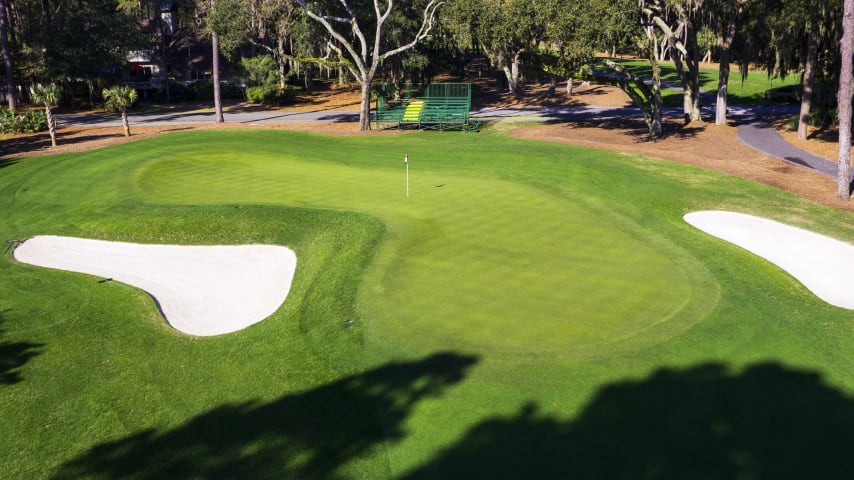
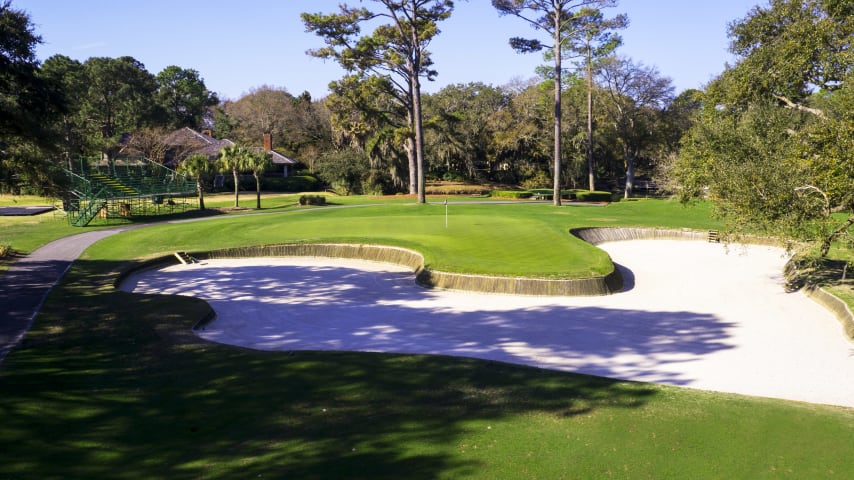
    Pete loved what he saw and put Alice in charge of the hole. With the help of one bulldozer, she next designed the massive “Mickey Mouse ears” greenside bunker that has made No. 13 at Harbour Town one of the most distinguishable holes on the PGA TOUR. She also opted to use cypress planks, not the typical Pete Dye railroad ties, to give the deep bunker a clean look beside the green.

    At 373 yards, the par 4 looks fairly innocent on paper, but in person, it is one of the most demanding holes on the course. A drive up the right side is necessary for a line into the green, which is protected by the cypress-banked bunker in front and a more traditional bunker behind the green. The typical Sunday pin is right in the front mouth of the green, creating a peninsula surrounded by sand on three sides.

    Hit the green, great. Miss the green in the sand and those cypress planks could force a bunker shot backwards or sideways.

    While Alice Dye’s name won’t be found on the scorecards at Harbour Town, the RBC Heritage field will feel her influence around the front bunker on No. 13. As Dye Designs was given more work after Harbour Town, Alice would take on a greater role, with her name attached to TPC Sawgrass, Whistling Straits, Kiawah Island, PGA West and other courses.


    PGA TOUR
    Privacy PolicyTerms of UseAccessibility StatementDo Not Sell or Share My Personal InformationCookie ChoicesSitemap

    Copyright © 2024 PGA TOUR, Inc. All rights reserved.

    PGA TOUR, PGA TOUR Champions, and the Swinging Golfer design are registered trademarks. The Korn Ferry trademark is also a registered trademark, and is used in the Korn Ferry Tour logo with permission.